Recent Posts
Preventing Bacterial Growth After Water Intrusion: Expert Tips from SERVPRO®
3/12/2025 (Permalink)
 Water intrusion can be a serious problem for homeowners and businesses in Topsham, ME, alike.
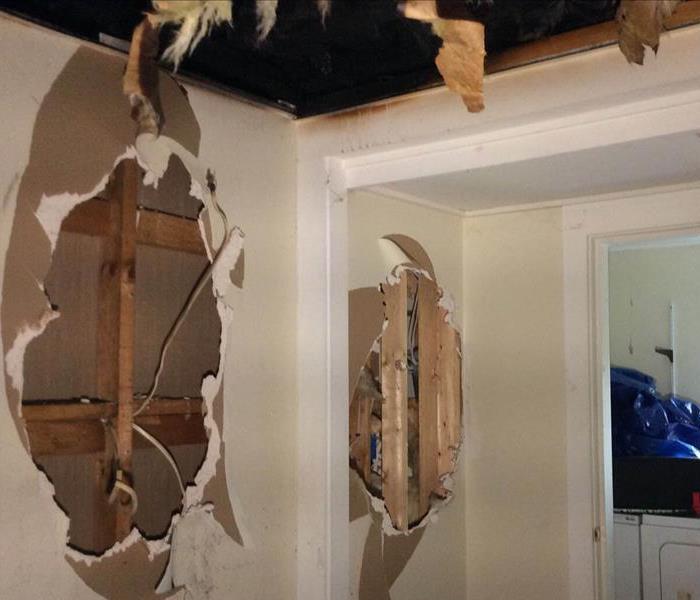
Water intrusion can be a serious problem for homeowners and businesses in Topsham, ME, alike. Whether caused by heavy rain, flooding, or plumbing failures, unwanted water can soak into building materials, carpets, and furniture, creating conditions that encourage bacterial growth.
To prevent long-term property damage and ensure your space is fully restored, it’s crucial to act quickly and follow proper drying and cleaning techniques. At SERVPRO®, we specialize in professional water damage restoration, ensuring moisture is effectively removed and surfaces are properly treated to prevent bacterial growth.
In this guide, we’ll explore how to prevent bacterial growth after water intrusion with expert-backed solutions.
Why Does Water Intrusion Lead to Bacterial Growth?
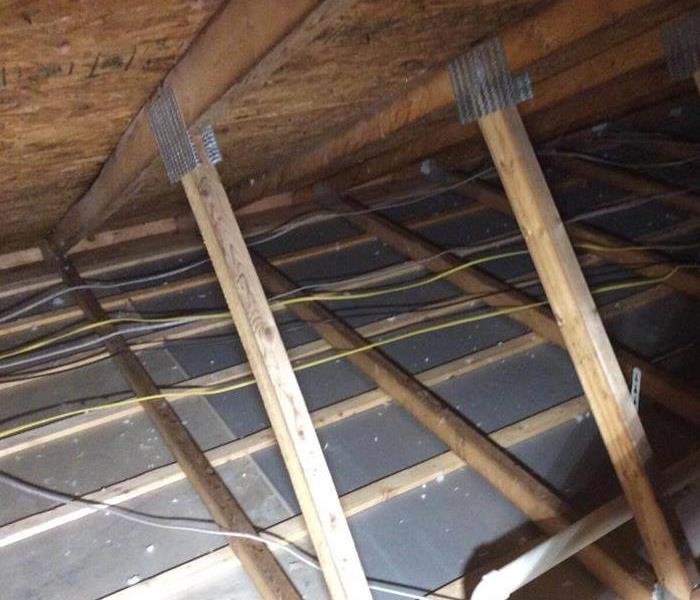
Bacteria thrive in moist environments, especially when water lingers on porous materials such as wood, drywall, and carpets. When water intrusion occurs, it creates the perfect environment for bacteria to spread, particularly in warm or humid conditions.
To prevent this, immediate moisture removal, cleaning, and proper drying are essential. The faster you act, the better your chances of avoiding costly repairs.
How to Prevent Bacterial Growth After Water Intrusion
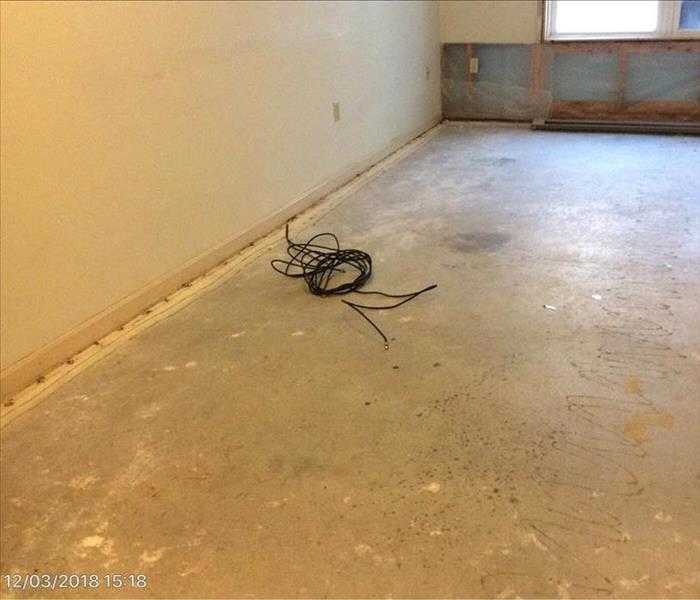
1. Remove Standing Water Immediately
The longer water sits, the higher the chance of bacteria multiplying. Start by extracting any standing water using:
- Wet/dry vacuums
- High-powered pumps (for larger areas)
- Absorbent materials such as towels and mops
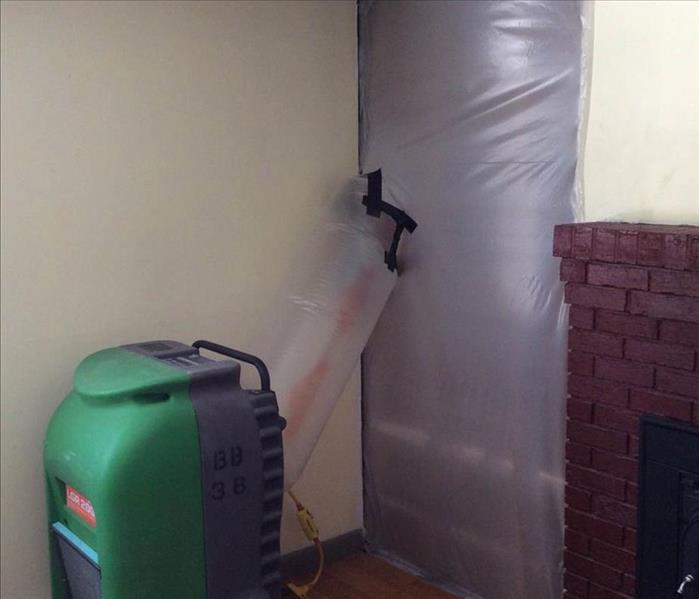
If the affected area is large or difficult to access, professional water extraction services like SERVPRO can ensure all moisture is thoroughly removed.
2. Increase Air Circulation and Dry Quickly
Drying out wet surfaces is key to preventing bacterial growth. Increase airflow by:
- Using air movers to accelerate evaporation
- Running dehumidifiers to remove excess moisture from the air
- Opening windows and doors (if weather permits)
Professional drying equipment ensures that hidden moisture—such as in wall cavities, under flooring, and inside insulation—does not go unnoticed.
3. Clean and Disinfect Affected Surfaces
After removing moisture, it’s important to clean and disinfect any surfaces that come into contact with water. Use:
- Mild detergents for general cleaning
- Disinfectants designed for water-damaged materials
- Professional-grade cleaning solutions for larger or heavily impacted areas
Professional restoration teams, like SERVPRO, use specialized cleaning agents and advanced equipment to ensure thorough decontamination of water-affected areas.
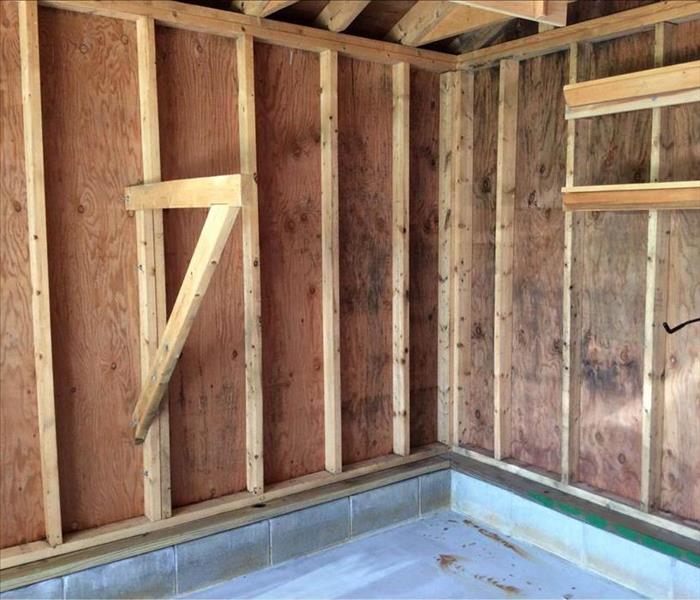
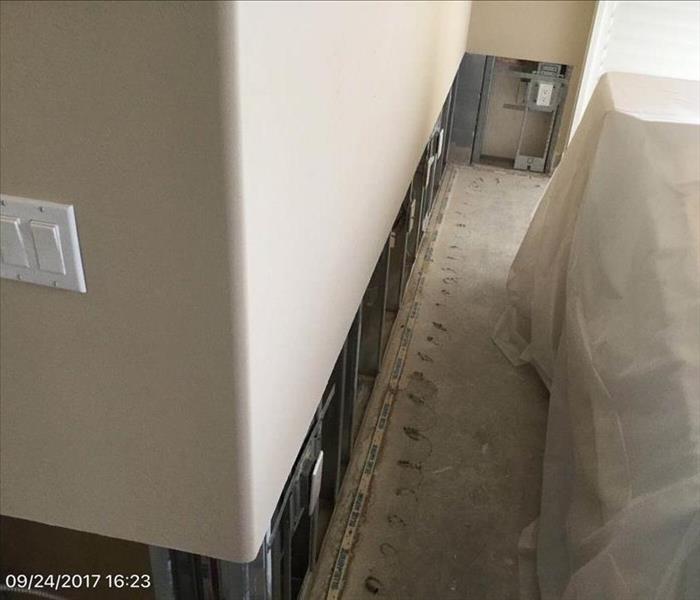
4. Remove and Replace Unsalvageable Materials
Not all materials can be restored after significant water intrusion. Porous materials like drywall, insulation, and carpeting may need to be removed and replaced to prevent long-term issues.
A professional assessment can help determine what materials are salvageable and what needs to be replaced.
5. Control Indoor Humidity Levels
Even after visible water is removed, high humidity can still encourage bacterial growth. Keep indoor humidity levels below 50 percent by:
- Using dehumidifiers to pull moisture from the air
- Running HVAC systems or fans to maintain airflow
- Sealing cracks or leaks to prevent moisture buildup
Humidity control is a key part of water damage restoration and ongoing property maintenance.
FAQs About Preventing Bacterial Growth After Water Intrusion
How long does it take for bacteria to develop after water intrusion?
Bacteria can begin developing within hours in damp environments. The faster you extract water and dry surfaces, the lower the risk of bacterial growth.
Can I use regular household fans to dry out water damage?
While household fans can help, professional-grade air movers and dehumidifiers are far more effective at removing moisture from walls, flooring, and other materials.
Should I replace water-damaged carpets?
If water intrusion is extensive, replacing carpets may be the best option. Professional restoration services can assess the damage and determine whether cleaning or replacement is necessary.
How can SERVPRO help with preventing bacterial growth after water damage?
SERVPRO provides expert water extraction, drying, and cleaning services using advanced equipment and professional techniques to prevent bacterial growth after water intrusion.
SERVPRO: Your Trusted Partner in Water Damage Restoration
Water intrusion can be overwhelming, but with the right prevention methods, you can stop bacterial growth and protect your property from further damage. At SERVPRO, we offer 24/7 emergency water damage restoration to ensure your home or business is dried, cleaned, and restored efficiently.
If you’ve experienced water intrusion, contact SERVPRO today for expert restoration services.
The impact of wildfires on air quality and respiratory health
11/18/2024 (Permalink)
Wildfires are becoming increasingly common, particularly in the western United States, and they pose a serious threat to air quality across vast regions. These fires release massive amounts of pollutants into the atmosphere, causing air quality to deteriorate rapidly. As a result, understanding the impact of wildfires on air quality is critical for individuals and businesses alike.
How Wildfires Affect Air Quality
When wildfires burn, they release various harmful pollutants, including particulate matter (PM), carbon monoxide, and volatile organic compounds (VOCs). The most significant concern, however, is fine particulate matter, known as PM2.5. These microscopic particles are small enough to penetrate deeply into the respiratory system, affecting air quality for miles beyond the fire's origin. During wildfire events, air quality index (AQI) levels can soar to unhealthy ranges, affecting not only the immediate area but also neighboring regions.
A report by the U.S. Environmental Protection Agency (EPA) noted that PM2.5 levels during wildfire events can increase by as much as 30 times their normal levels. This dramatic spike in particulate matter is a primary concern for maintaining air quality standards in regions prone to wildfires.
Factors That Worsen Air Quality During Wildfires
Several factors can exacerbate the impact of wildfires on air quality, including:
- Wind patterns: Strong winds can carry smoke and pollutants from wildfires over long distances, affecting areas hundreds of miles away from the fire.
- Prolonged fire seasons: With climate change contributing to longer and more severe fire seasons, regions experience extended exposure to poor air quality.
- Urban vs. rural fires: Fires in urban areas may cause more toxic pollutants due to burning materials such as plastics and chemicals, further degrading air quality.
Tips for Monitoring Air Quality
Staying informed about local air quality is essential during wildfire season. Here are a few ways you can monitor the air quality in your area:
- Check local air quality reports: Websites like AirNow.gov provide real-time updates on AQI levels.
- Install air quality apps: Apps such as IQAir or Plume Labs can send alerts directly to your phone.
- Invest in air quality monitors: Personal air quality sensors can help you monitor conditions inside your home or business.
SERVPRO®: Helping You Breathe Easier
At SERVPRO of Bath/Brunswick, we understand the importance of maintaining clean air in your home or business, especially during wildfire season. If you need assistance improving indoor air quality or addressing damage caused by wildfire smoke, our expert team is ready to help.
Stay informed and proactive to protect your property from the impact of wildfires on air quality.
The Aftermath of Water Damage: Effective Strategies for Handling Mold and Mildew
10/16/2024 (Permalink)
 Understanding how to properly handle mold and mildew in the aftermath of water damage is essential for protecting your home.
Water damage can be a homeowner's worst nightmare in Topsham, Maine, especially when it leads to the growth of mold and mildew. These silent intruders can begin to grow within 24 to 48 hours after water exposure, making prompt action crucial. Understanding how to properly handle mold and mildew in the aftermath of water damage is essential for protecting your home and maintaining its structural integrity.
Understanding the Threat of Mold and Mildew
Mold and mildew thrive in damp environments, and water damage provides the perfect conditions for these fungi to flourish. Once they begin to grow, they can spread rapidly, affecting not just the area that was initially damaged, but potentially other areas of your home as well. To mitigate the risk of mold and mildew, it is essential to address water damage quickly and thoroughly.
Key Steps to Prevent Mold Growth After Water Damage
One of the most effective strategies for preventing mold and mildew after water damage is to ensure that the affected area is dried out as quickly as possible. According to the Federal Emergency Management Agency (FEMA), it’s crucial to dry out water-damaged areas within 24 to 48 hours to prevent mold growth. Here are some key steps to follow:
- Remove standing water immediately: Use pumps, wet vacuums, and absorbent materials to remove as much water as possible from the affected area.
- Ventilate the area: Open windows and doors, and use fans and dehumidifiers to increase airflow and reduce humidity.
- Dispose of damaged materials: Remove and properly dispose of materials like carpeting, insulation, and drywall that have been soaked with water.
- Clean and disinfect: Use appropriate cleaning agents to clean and disinfect surfaces to prevent mold spores from taking root.
When to Call in Professional Help
While there are steps you can take on your own to mitigate the risk of mold and mildew, severe water damage often requires professional intervention. Companies like SERVPRO® have the expertise and equipment necessary to thoroughly dry out affected areas, remove mold, and restore your home to its pre-damage condition. Professional restoration services can also identify hidden areas of moisture that may not be visible to the naked eye but are prime breeding grounds for mold.
Conclusion
In the aftermath of water damage, time is of the essence. By taking prompt and effective action, you can significantly reduce the risk of mold and mildew taking hold in your home. However, when in doubt, it’s always best to consult with professionals who can ensure that your home is thoroughly restored and safe from future mold growth.
Mold in Crawl Spaces: Prevention and Remediation
9/24/2024 (Permalink)
 Don't wait for mold to become a bigger issue—contact SERVPRO today.
Crawl spaces are often overlooked when it comes to home maintenance, but they can quickly become a breeding ground for mold if not properly cared for. Mold thrives in damp, dark environments, and crawl spaces often meet these conditions, especially in areas like Bath/Brunswick. In this blog, we’ll explore expert insights on how to prevent and remediate mold in crawl spaces, ensuring the integrity of your home.
Why Mold Develops in Crawl Spaces
Mold growth in crawl spaces is typically caused by moisture. This moisture can come from a variety of sources, including poor drainage, leaking pipes, and high humidity levels. According to the U.S. Environmental Protection Agency (EPA), nearly 50% of the air in your home can flow up from the crawl space, so addressing moisture issues in this area is critical for maintaining the overall condition of your home. If water is allowed to accumulate in your crawl space, mold can begin to grow within 24-48 hours.
Tips for Preventing Mold in Crawl Spaces
Prevention is the best strategy when it comes to mold in crawl spaces. Here are some effective steps homeowners can take:
- Ensure Proper Ventilation: Crawl spaces need good airflow to prevent moisture buildup. Installing vents or fans can help circulate air and keep humidity levels low.
- Install a Vapor Barrier: A vapor barrier made of polyethylene can cover the ground in your crawl space, preventing moisture from the soil from seeping into the area.
- Repair Leaks Immediately: Check for any plumbing leaks or cracks in your foundation. Addressing these issues promptly can prevent excess moisture from entering your crawl space.
- Use a Dehumidifier: In areas with high humidity, using a dehumidifier in your crawl space can significantly reduce moisture levels and prevent mold growth.
- Inspect Gutters and Downspouts: Ensure that water from your gutters is directed away from your home’s foundation. Improper drainage can lead to water seeping into your crawl space.
Remediating Mold in Crawl Spaces
If mold has already developed in your crawl space, professional remediation is often necessary. SERVPRO of Bath/Brunswick uses specialized equipment and techniques to eliminate mold and restore your crawl space to a safe, mold-free environment. We begin with a thorough inspection to assess the extent of the mold growth. Our team then uses advanced cleaning and drying techniques, including HEPA vacuums and air scrubbers, to remove mold and prevent future growth.
Trust the Experts at SERVPRO of Bath/Brunswick
Mold in crawl spaces is a common issue, but with the right prevention and remediation strategies, you can protect your home. At SERVPRO of Bath/Brunswick, our team has the experience and expertise to handle mold remediation efficiently and effectively. To learn more about mold in crawl spaces, check out the EPA’s guide on moisture control and mold prevention here.
Don't wait for mold to become a bigger issue—contact SERVPRO® today for expert crawl space mold remediation!
The Role of SERVPRO® in Northeast Storm Damage Restoration
9/11/2024 (Permalink)
 This blog highlights the essential services SERVPRO offers to underscore the impact of storm damage in Topsham, Maine.
Storms in the Northeast can be relentless, causing significant damage to homes and businesses. Maine, in particular, is no stranger to these destructive weather events. SERVPRO® plays a crucial role in storm damage restoration, providing comprehensive services to help you recover swiftly and efficiently. This blog highlights the essential services SERVPRO offers and includes relevant statistics to underscore the impact of storm damage in Topsham, Maine.
Understanding Storm Damage in Maine
Maine experiences severe storms that result in substantial property damage each year. According to the Maine Emergency Management Agency, in 2022, there were over 1,000 reported incidents of storm damage, leading to millions of dollars in repair costs.
Immediate Response to Storm Damage
When a storm hits, quick action is vital to minimize damage and begin the restoration process. SERVPRO is renowned for its rapid response time, available 24/7 to address emergencies. Our trained professionals arrive equipped to assess the damage and implement immediate protective measures, such as tarping and boarding up damaged areas.
Comprehensive Water Damage Restoration
Storms often bring heavy rainfall, resulting in flooding and water damage. SERVPRO offers extensive water damage restoration services, including:
- Water Extraction: Using advanced equipment to remove standing water quickly.
- Drying and Dehumidification: Employing industrial-grade dehumidifiers and air movers to thoroughly dry affected areas.
- Mold Remediation: Addressing mold growth that can occur in damp conditions to ensure a safe environment.
Structural Repairs and Restoration
Beyond water damage, storms can compromise the structural integrity of your property. SERVPRO provides a full range of repair and restoration services:
- Structural Drying: Ensuring that all structural components are completely dry to prevent further damage.
- Roof Repair: Fixing storm-damaged roofs to protect your home from future weather events.
- Reconstruction Services: Rebuilding and restoring severely damaged areas to their original condition.
Content Restoration and Cleaning
Storms can also affect personal belongings and business inventory. SERVPRO offers specialized content restoration services, including:
- Contents Cleaning: Cleaning and sanitizing personal items and furniture affected by storm damage.
- Document Restoration: Using advanced techniques to restore important documents and photos.
- Electronics Cleaning: Salvaging and restoring electronic devices damaged by water and debris.
Preventative Measures and Preparedness
In addition to restoration, SERVPRO helps homeowners and businesses prepare for future storms. Our experts provide:
- Storm Readiness Plans: Customized plans to ensure you're prepared for future storms.
- Inspection and Maintenance: Regular inspections and maintenance to identify and address potential vulnerabilities.
Trust SERVPRO for Expert Storm Damage Restoration
When a storm strikes, you need a trusted partner to help you navigate the recovery process. SERVPRO's expertise in storm damage restoration ensures that your property is restored efficiently and effectively, minimizing disruption to your life and business.
For more information on how SERVPRO can assist with storm damage restoration in the Northeast, contact us today. We are here to help you weather the storm.
Propane Tank Safety: Essential Tips for Safe Usage and Storage
8/14/2024 (Permalink)
 Here are some essential tips to help you safely use and store propane tanks.
Propane tanks are a convenient energy source for various applications, from grilling to heating. However, improper usage and storage can lead to dangerous situations. Ensuring the safe use and storage of propane tanks is crucial for preventing accidents and maintaining a secure environment. Here are some essential tips to help you safely use and store propane tanks.
Understanding Propane Tank Basics
Propane tanks are pressurized containers that store propane gas, commonly used for outdoor grills, heaters, and other appliances. Knowing the basics about your propane tank, including its size, capacity, and usage instructions, is the first step in ensuring safety.
Keywords: Propane tank safety, propane tank basics, safe propane use
Safe Usage of Propane Tanks
When using propane tanks, safety should always be your top priority. Follow these guidelines to ensure you are using your propane tank correctly:
- Inspect Before Use: Before connecting your propane tank, inspect it for any signs of damage, rust, or leaks. Use a solution of soap and water to check for leaks around the valve area; bubbles indicate a leak.
- Proper Connection: Ensure all connections are secure. Use the appropriate fittings and follow the manufacturer’s instructions when connecting the tank to your appliance.
- Ventilation: Always use propane appliances in well-ventilated areas to prevent the build-up of harmful gases. Never use propane tanks indoors.
- Follow Manufacturer Guidelines: Each propane appliance has specific guidelines. Always read and adhere to these instructions to prevent accidents.
Keywords: Propane tank inspection, safe propane connection, propane ventilation, propane usage guidelines
Storing Propane Tanks Safely
Proper storage of propane tanks is as important as their safe usage. Here are some tips for storing your propane tanks safely:
- Cool and Dry Location: Store propane tanks in a cool, dry place away from direct sunlight and heat sources. Extreme temperatures can cause the tank to weaken or the pressure to increase dangerously.
- Upright Position: Always store propane tanks upright to prevent leaks and ensure the pressure relief valve functions correctly.
- Outdoor Storage: If possible, store propane tanks outdoors. If you must store them indoors, make sure it is a well-ventilated area away from living spaces.
- Secure Storage Area: Ensure the storage area is secure and out of reach of children and pets. Use a storage cage if necessary.
Keywords: Propane tank storage, safe propane storage, outdoor propane storage, propane tank safety tips
Emergency Response and Maintenance
In case of a propane leak or emergency, it’s vital to know the correct response:
- Shut Off Valve: Immediately shut off the propane supply by turning the tank valve clockwise.
- Evacuate Area: Leave the area and call emergency services if the leak is significant.
- Regular Maintenance: Schedule regular maintenance checks for your propane tanks and appliances to ensure they are in good working condition.
By following these guidelines, you can ensure the safe usage and storage of propane tanks, protecting yourself and your loved ones from potential hazards. For more safety tips and services, contact SERVPRO® today.
Understanding How Humidity Impacts Mold Growth
7/10/2024 (Permalink)
 We explore the relationship between humidity and mold growth and provide insights into how to manage humidity levels effectively.
Humidity plays a significant role in mold growth within indoor environments. Excess moisture in the air can create the perfect conditions for mold spores to thrive and proliferate, leading to potential damage to property and compromising indoor air quality. In this blog post, we'll explore the relationship between humidity and mold growth and provide insights into how to manage humidity levels effectively to prevent mold infestations.
The Connection Between Humidity and Mold Growth
Ideal Conditions for Mold
Mold spores are ubiquitous in the environment, but they require specific conditions to grow and multiply. High humidity levels, typically above 60%, provide the moisture necessary for mold spores to germinate and form colonies on surfaces such as walls, ceilings, and floors.
Moisture Absorption
Humid air can lead to moisture absorption by building materials such as drywall, wood, and insulation. As these materials become saturated with moisture, they create a conducive environment for mold growth. Porous materials, in particular, are susceptible to mold infestations when exposed to elevated humidity levels.
Poor Ventilation
Inadequate ventilation exacerbates the impact of high humidity on mold growth. Without proper airflow, moisture-laden air becomes trapped indoors, increasing the risk of condensation and mold formation on surfaces. Areas with poor ventilation, such as bathrooms, kitchens, and basements, are particularly susceptible to mold growth in humid conditions.
Managing Humidity Levels to Prevent Mold Growth
Utilize Dehumidifiers
Dehumidifiers are effective tools for reducing indoor humidity levels and preventing mold growth. By extracting excess moisture from the air, dehumidifiers help maintain relative humidity levels below 60%, creating an inhospitable environment for mold spores to proliferate.
Improve Ventilation
Proper ventilation is essential for controlling humidity levels and promoting airflow within indoor spaces. Ensure adequate ventilation in areas prone to moisture buildup, such as bathrooms, kitchens, and laundry rooms, by installing exhaust fans or opening windows when possible.
Repair Leaks and Seal Cracks
Addressing sources of moisture intrusion, such as leaks and cracks in walls, roofs, and plumbing fixtures, is crucial for preventing mold growth. Regular inspections and timely repairs can help prevent water damage and mitigate the risk of mold infestations caused by excess moisture.
Monitor Indoor Humidity
Monitor indoor humidity levels regularly using a hygrometer or humidity meter. Ideally, indoor humidity should be maintained between 30% and 50% to prevent mold growth and maintain a comfortable indoor environment. Take corrective action if humidity levels exceed recommended thresholds.
Humidity plays a pivotal role in mold growth within indoor environments. By understanding the relationship between humidity and mold growth and implementing effective humidity control measures, property owners can mitigate the risk of mold infestations and maintain a healthy indoor environment. If you're dealing with mold issues or need assistance with humidity control, don't hesitate to contact a professional restoration company like SERVPRO® for expert guidance and assistance.
Managing Water Damage in Condos and Apartments: Responsibilities and Solutions
6/14/2024 (Permalink)
Water damage poses a unique challenge in multi-unit residential buildings such as condos and apartments. When water intrusion occurs in one unit, it can quickly spread to neighboring units, causing extensive damage and disruption. In such shared living spaces, navigating responsibilities and implementing effective solutions for water damage requires clear communication and collaboration among residents, property managers, and restoration professionals. In this blog, we'll explore the responsibilities of various stakeholders and discuss solutions for managing water damage in condos and apartments.
Identifying Responsibilities
In condos and apartments, the responsibility for addressing water damage is typically outlined in the governing documents, such as the condo association bylaws or the rental agreement. Generally, property managers or condo associations are responsible for maintaining the building's structural integrity and common areas, while individual unit owners or tenants are responsible for maintaining their unit's interior.
Reporting and Communication
Prompt reporting of water damage incidents is essential for minimizing the spread of damage and expediting the restoration process. Residents should report any signs of water intrusion, such as leaks, flooding, or moisture stains, to property management or the condo association immediately. Clear communication channels between residents and management facilitate timely response and ensure that water damage is addressed promptly.
Mitigating Further Damage
In the event of water damage, residents can take immediate action to mitigate further damage while waiting for professional assistance. This may include shutting off the water supply, removing excess water with towels or a wet/dry vacuum, and placing fans or dehumidifiers to aid in drying out affected areas. However, residents should avoid attempting extensive repairs or restoration on their own and leave the job to trained professionals.
Coordinating Restoration Efforts
Property managers or condo associations play a crucial role in coordinating restoration efforts in multi-unit residential buildings. Upon receiving reports of water damage, they should promptly engage qualified restoration professionals to assess the extent of the damage and develop a restoration plan. Restoration efforts may involve drying out affected areas, repairing damaged structures, and restoring the property to its pre-damage condition.
Insurance Coverage
Understanding insurance coverage is essential for both residents and property managers in condos and apartments. Property insurance typically covers damage to the building's structure and common areas, while individual unit owners or tenants are responsible for insuring their personal belongings and interior fixtures. It's important for residents to familiarize themselves with their insurance policies and report water damage incidents to their insurance provider promptly.
Prevention Measures
Preventing water damage is preferable to dealing with its aftermath. Property managers and condo associations can implement preventive measures such as regular inspections of plumbing systems, maintenance of roof and exterior surfaces, and installation of leak detection devices. Residents can also take proactive steps to prevent water damage by promptly addressing leaks, properly maintaining appliances, and avoiding behaviors that increase the risk of water intrusion.
Water damage in condos and apartments requires a coordinated approach involving residents, property managers, and restoration professionals. By understanding their responsibilities, communicating effectively, mitigating further damage, coordinating restoration efforts, understanding insurance coverage, and implementing prevention measures, stakeholders can effectively manage water damage incidents and protect the integrity of multi-unit residential buildings. Through collaboration and proactive measures, condos and apartments can remain safe, comfortable, and resilient living spaces for their residents.
Navigating the Depths: Recovering from Flooded Basements in the Northeast
5/4/2024 (Permalink)
The Northeast, known for its diverse climate, occasionally experiences heavy rainfall and storms that can lead to basement flooding. Recovering from a flooded basement is a daunting task, but with the right approach, Northeast homeowners can restore their homes and prevent future incidents. Here's a comprehensive guide to help you navigate the aftermath of a flooded basement.
Ensure Safety First
Before entering a flooded basement, prioritize safety. Turn off the electricity to prevent electrical hazards, and if the water level is high, wait for it to recede before entering. Always wear protective gear such as rubber boots, gloves, and a mask to minimize exposure to contaminants.
Understanding the source of the flooding is crucial for effective cleanup and prevention. Whether it's heavy rainfall, a burst pipe, or a sewer backup, identifying the cause will guide your recovery efforts.
Remove Water and Debris
Use a submersible pump, a wet/dry vacuum, or buckets to remove standing water. Be thorough in removing waterlogged items and debris to prevent mold growth and further damage.
Take photographs and document the damage for insurance claims. Detailed records of the affected areas and belongings will streamline the claims process and ensure you receive adequate compensation for your losses.
Ventilate and Dehumidify
Open windows and doors to facilitate air circulation and speed up the drying process. Use dehumidifiers to reduce humidity levels and prevent mold growth. Ventilation is crucial for preventing musty odors and promoting a healthy indoor environment.
Have a qualified professional inspect and, if necessary, repair your electrical systems. Water damage can compromise wiring and pose a serious risk of electrical fires.
Sanitize and Disinfect
Floodwater may contain contaminants, so it's essential to thoroughly sanitize and disinfect the affected areas. Use a mixture of bleach and water to clean surfaces, walls, and any salvageable items.
Dispose of irreparable items such as soaked drywall, insulation, and carpeting. These materials can harbor mold and compromise the structural integrity of your home.
Address Mold Promptly
Mold can start growing within 24 to 48 hours after flooding. Use mold-killing solutions on surfaces, and consider hiring professionals for extensive mold remediation to ensure a thorough and safe cleanup.
Take steps to prevent future basement flooding. Install a sump pump, consider exterior grading to direct water away from the foundation, and inspect and repair foundation cracks promptly.
When in doubt or facing extensive damage, consult with professionals experienced in water damage restoration. Their expertise and specialized equipment can accelerate the recovery process and minimize long-term consequences. Recovering from a flooded basement in the Northeast requires diligence, patience, and a systematic approach. By prioritizing safety, thoroughly cleaning and disinfecting, and implementing preventative measures, homeowners can not only recover from the immediate damage but also fortify their homes against future flooding challenges. Remember, professional assistance is always available to ensure a thorough and effective recovery process.
Unseen Consequences: Understanding the Impact of Smoke Damage on HVAC Systems
4/16/2024 (Permalink)
When a fire occurs, the impact is not confined to the visible damage alone. Smoke, a pervasive byproduct of fires, can infiltrate various parts of a property, including HVAC (Heating, Ventilation, and Air Conditioning) systems. In this blog, we'll delve into the often-overlooked consequences of smoke damage on HVAC systems and why addressing this issue is crucial for comprehensive fire damage restoration.
Smoke Residue in Ductwork
- Smoke particles are incredibly fine and can infiltrate the HVAC ductwork. Over time, this residue accumulates, affecting the overall air quality and potentially causing long-term issues if left unaddressed.
Circulation of Odor
Smoke carries strong odors that can permeate the HVAC system. Without proper cleaning, these odors may linger, affecting the comfort of the indoor environment even after visible fire damage has been addressed.
Damaged HVAC Components
- Smoke particles can settle on HVAC components, including fans, motors, and coils. This can lead to increased wear and tear, reduced efficiency, and potential malfunctions if the system is not thoroughly cleaned and restored.
Reduced Efficiency
- Smoke residue acts as an insulator, reducing the efficiency of the HVAC system. As the system struggles to maintain optimal performance, energy consumption may increase, leading to higher utility bills.
Potential Corrosion
Smoke contains acidic elements that, when settled on HVAC components, can contribute to corrosion over time. Corroded parts can compromise the structural integrity of the system, leading to premature failure.
Contaminated Air Filters
- Smoke particles can clog air filters, reducing airflow and causing the HVAC system to work harder. Regular replacement or thorough cleaning of filters is necessary to maintain optimal performance.
Residue in the Blower Motor
- The blower motor, a critical component of the HVAC system, can accumulate smoke residue. This accumulation can hinder the motor's functionality, leading to decreased airflow and increased strain on the system.
Extended Restoration Process
- Failure to address smoke damage in the HVAC system can prolong the overall restoration process. Thorough cleaning and, if necessary, replacement of HVAC components are essential to ensure a comprehensive restoration.
Persistent Odors
- Even after addressing visible damage, the presence of smoke particles in the HVAC system can contribute to persistent odors. Proper cleaning and restoration are crucial for eliminating these lingering smells.
Professional Inspection is Key
Identifying and addressing smoke damage in HVAC systems requires a professional inspection. Experienced technicians can assess the extent of the damage, determine the appropriate cleaning methods, and ensure the system is restored to optimal functionality.
Understanding the impact of smoke damage on HVAC systems is essential for a holistic fire damage restoration process. By addressing not only visible damage but also the often-hidden consequences in the HVAC system, property owners can ensure a thorough recovery and the long-term efficiency of their heating and cooling systems. Professional inspection and restoration are key components of mitigating the impact of smoke damage, ensuring a healthier, more efficient indoor environment.


 24/7 Emergency Service